How To: Create a New Gameplay Ability
For this tutorial we’re going to make a new ability that executes each time the player presses the keyboard G key.
We will:
- Create new assets:
InputActiondata asset (IA_G)InputTagGameplay Tag (InputTag.Actions.G)LyraGameplayAbilityblueprint (B_XG_Player_G)
- Connect these assets to Lyra:
- Map keyboard to
InputAction - Map
InputActiontoInputTag - Map
InputTagtoLyraGameplayAbility
- Map keyboard to
The end result will be: Pressing keyboard G will cause our LyraGameplayAbility to execute.
Prefer video? If so jump over to my YouTube tutorial video covering this topic.
Note: The naming convention here is not going to be ideal because this ability is intended only for developer use. For a real ability you’d want to name it something that actually represents what you intend this ability to do. So rather than “Ability G” you’d want to use for example “Ice Trap Ability” or “Shoot Rocket Ability” or whatever, disassociating it with the input required to make the ability happen.
1. Create a New Input Action
Right click in the editor content browser, choose: Input > Input Action
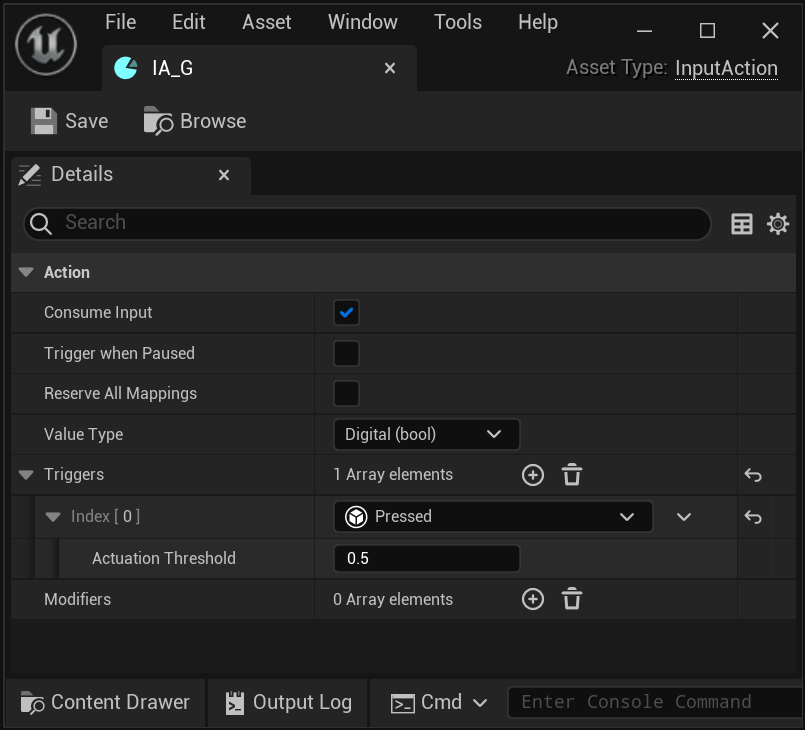
Name it IA_G, configure it as in this screenshot:
2. Create new Gameplay Tag
Open Project Settings, click Project > GameplayTags.
In Gameplay Tags > Gameplay Tag List, add a new tag.
Name the new tag InputTag.Ability.G
3. Add Keyboard Mapping
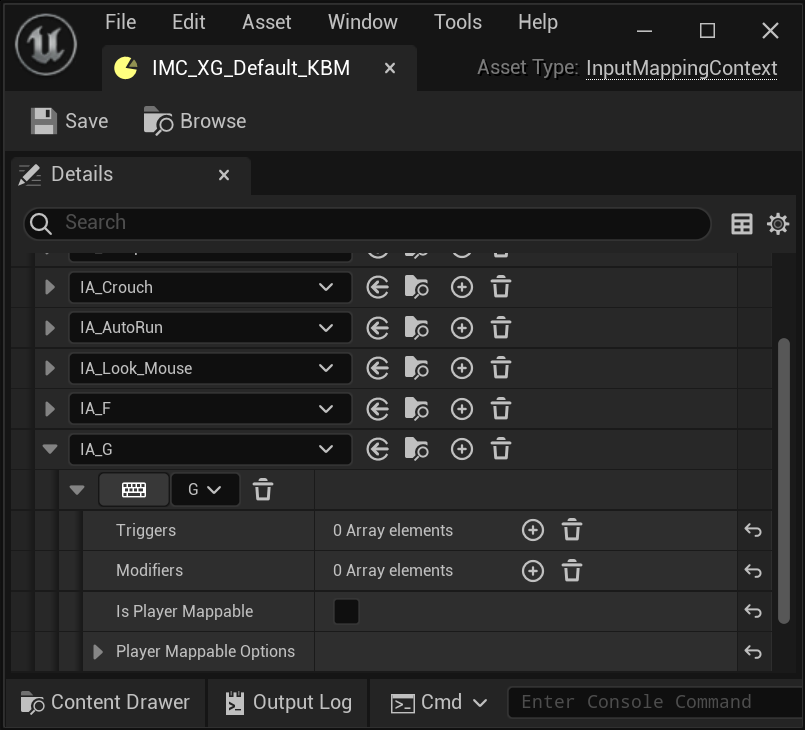
Open the InputMappingContext where you want the G ability to be active. Mine is called IMC_XG_Default_KBM.
Add IA_G to the list of Mappings > Mappings. Configure it as in this screenshot:
Tip: If you don’t know which InputMappingContext to modify:
- Open your Map
- Open the Map’s Experience
- Look in
Gameplay>Action Sets- Open each action set and look for one with an
Add Input Mappingaction.- The Input Config listed here is the one you’ll want to modify.
- Keep this open, you’ll probably need it in the next step also.
- Open each action set and look for one with an
4. Map Input Data to Input Tag
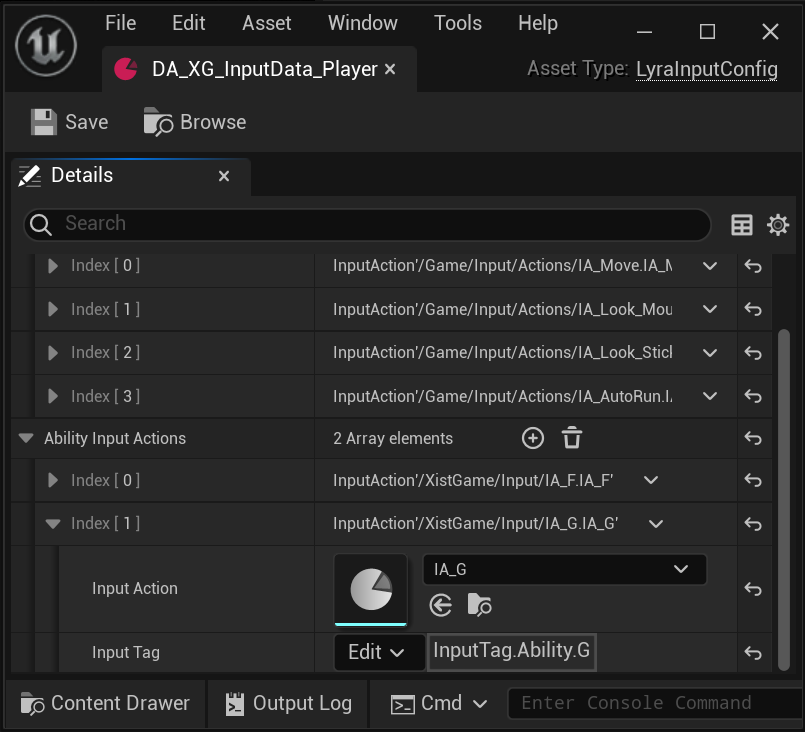
Open the LyraInputConfig where you want to be able to use the G ability. Mine is called DA_XG_InputData_Player.
Add a new Ability Input Action (Ability, not Native). Set the Input Action = IA_G and set the Input Tag = InputTag.Ability.G
Tip: If you don’t know which LyraInputConfig data asset to modify:
- Open your Map
- Open this Map’s Experience definition
- Look in
Gameplay>Action Sets- Open each action set and look for one with an
Add Input Bindsaction.- The Input Config listed here is the one you’ll want to modify.
- Open each action set and look for one with an
5. Create new Lyra Gameplay Ability
Right click on content browser, Blueprint Class, in All Classes search for LyraGameplayAbility. I named mine GA_XG_Player_G.
Here is the Event Graph:
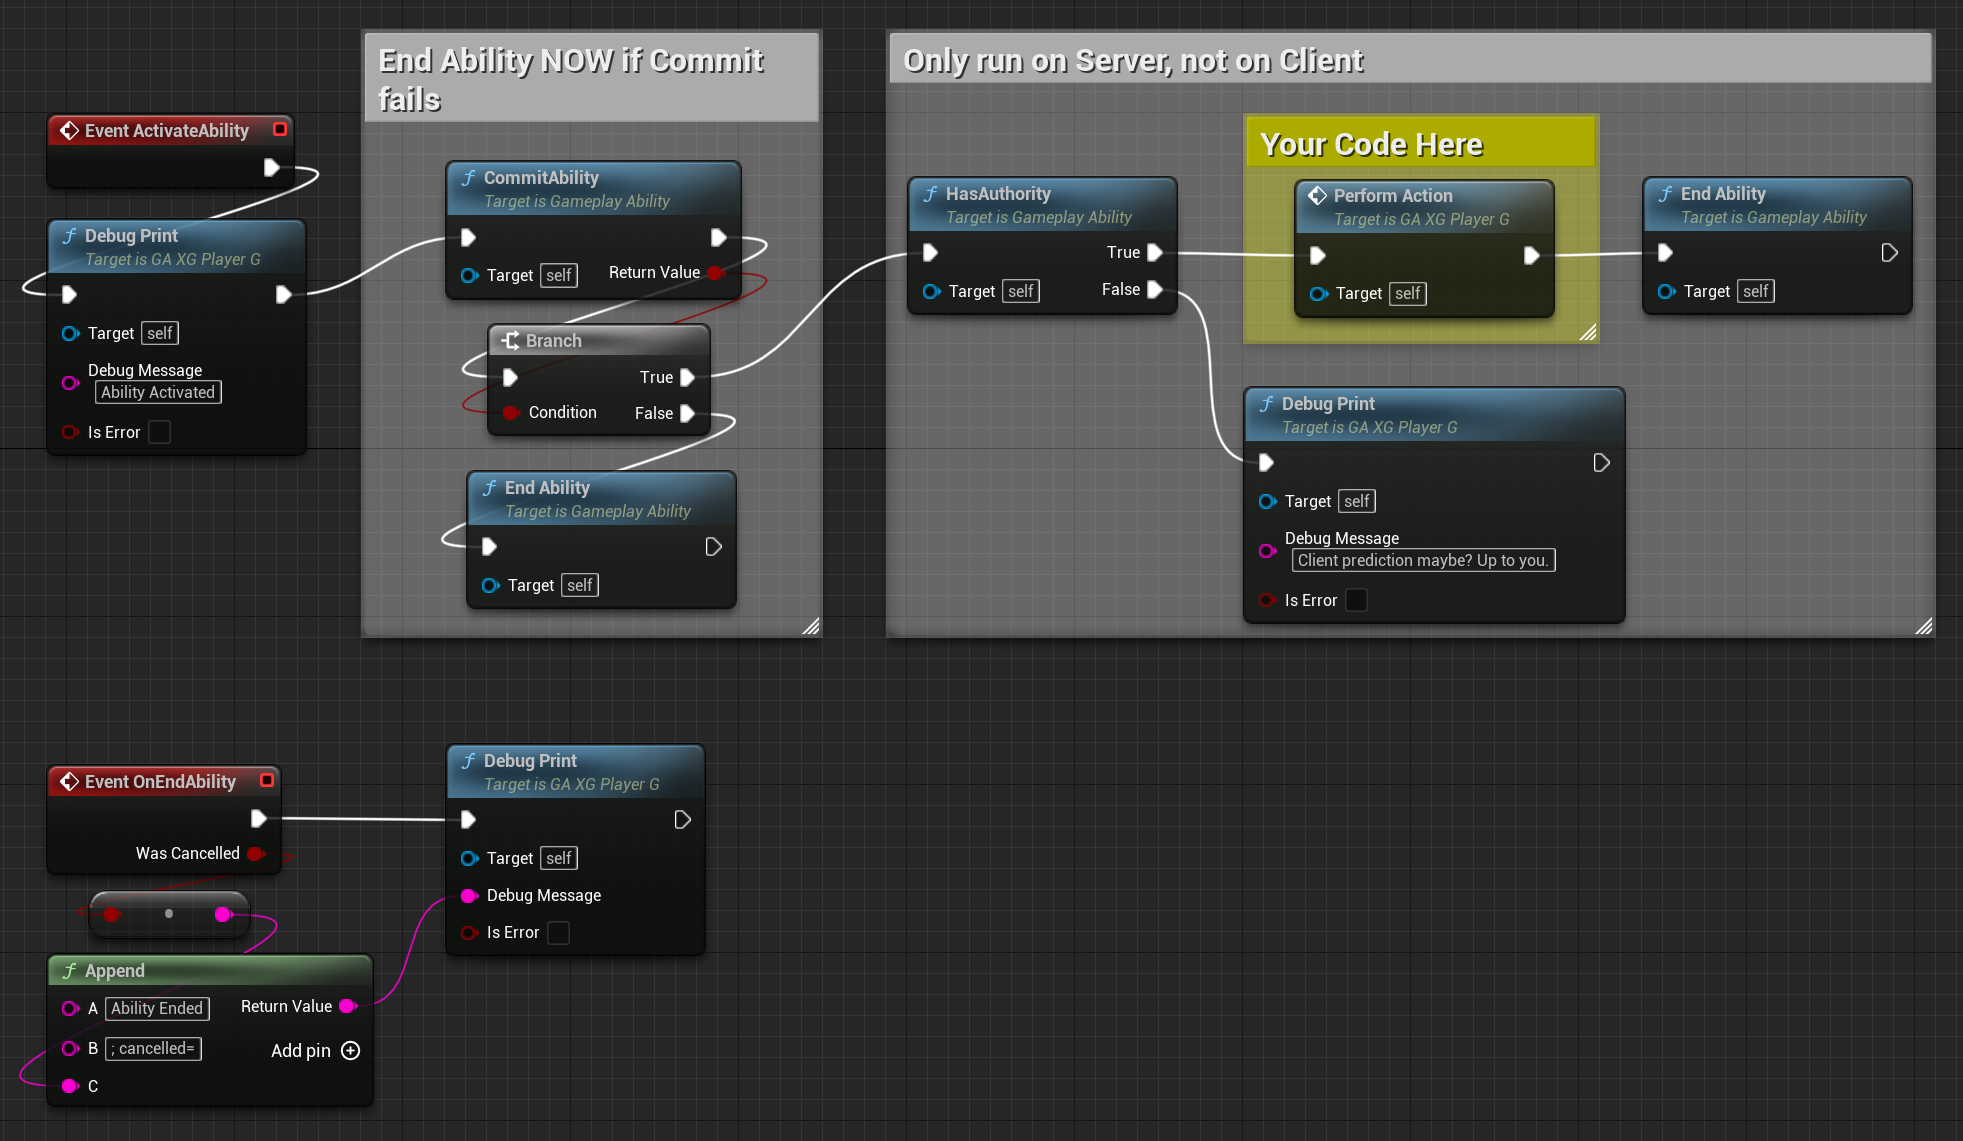
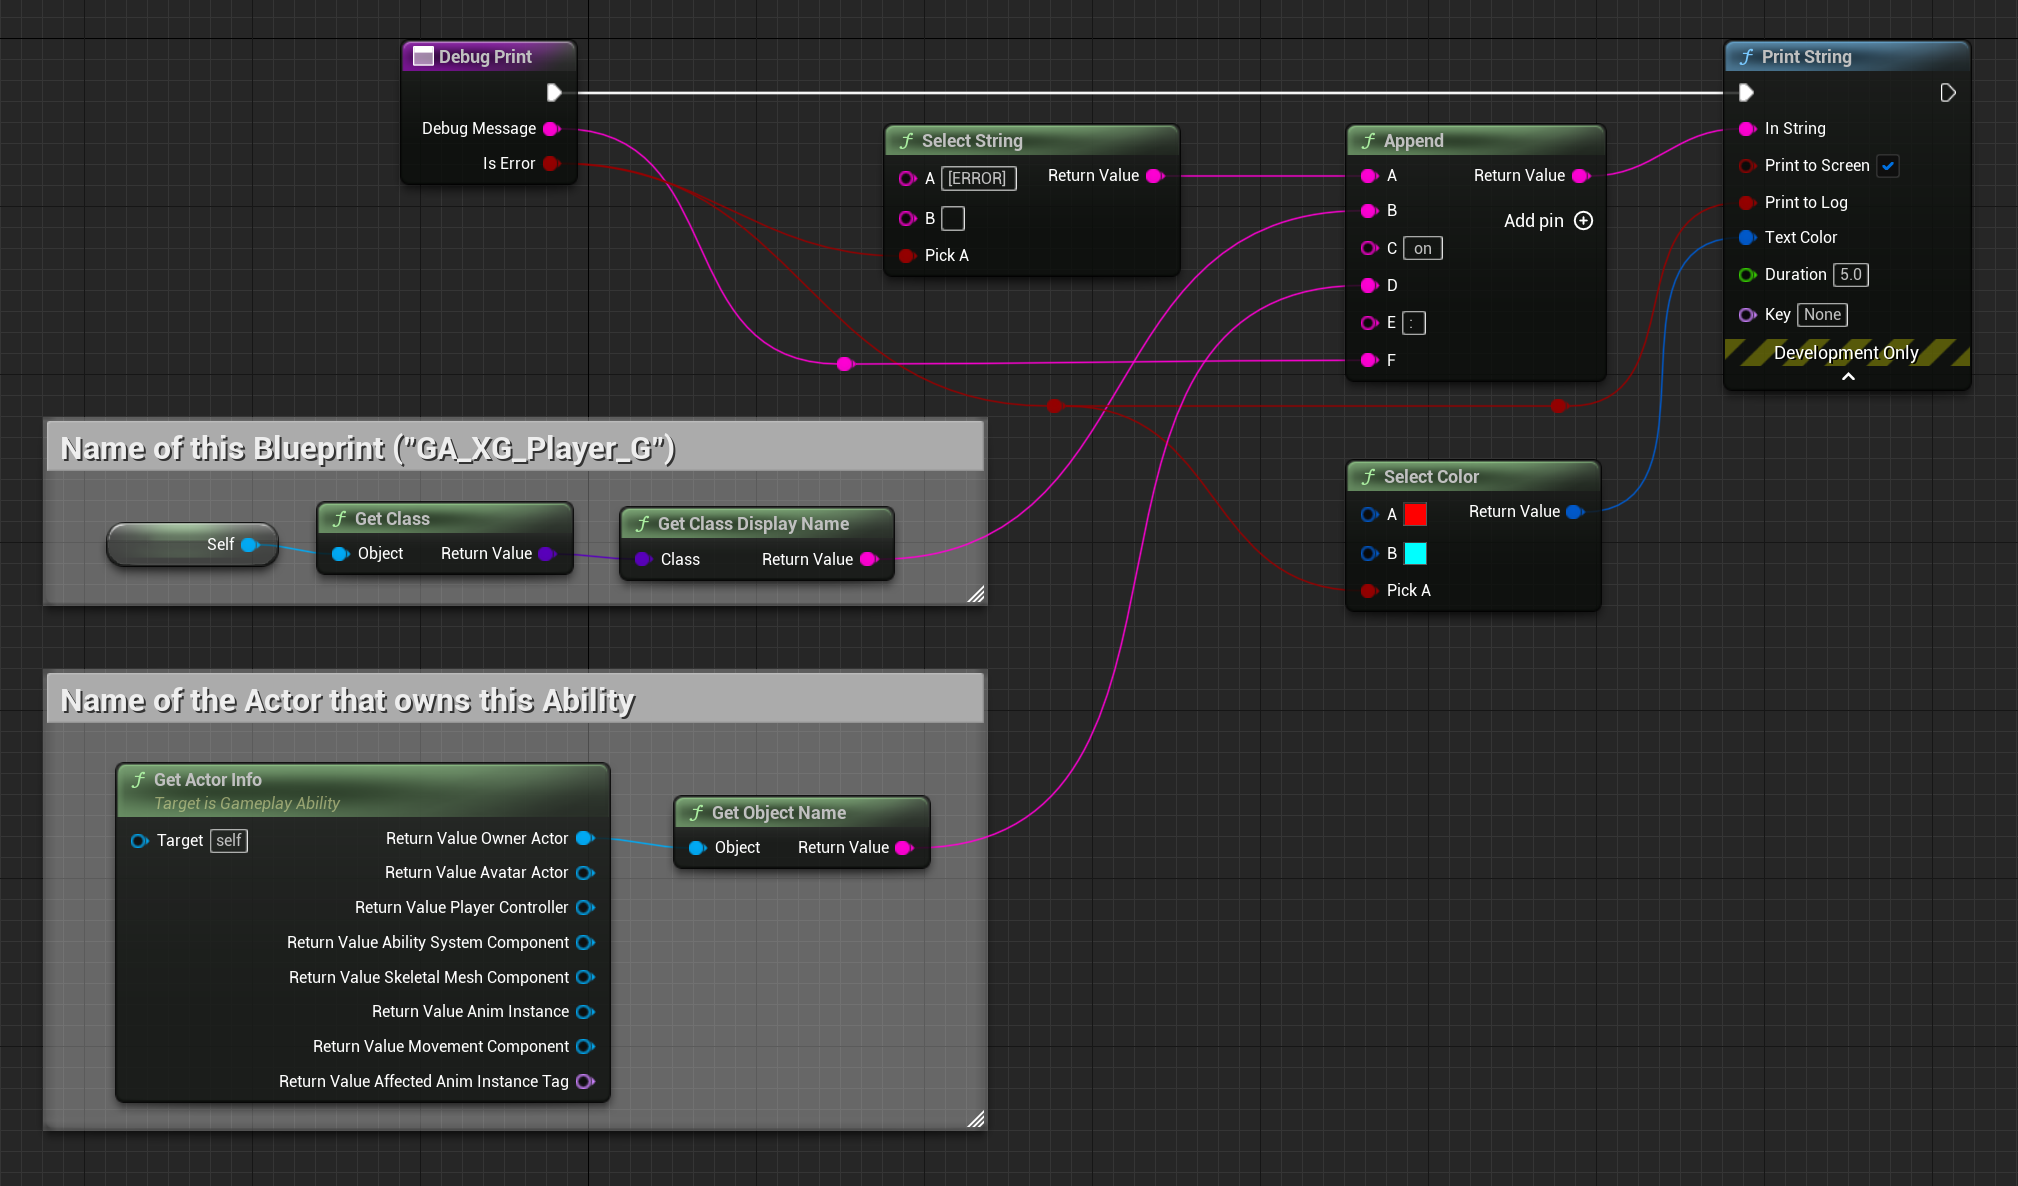
Here is the DebugPrint function, which is not at all important to this demo other than to show you there is nothing magical happening in here:
6. Add New Ability to the Player’s Ability Set
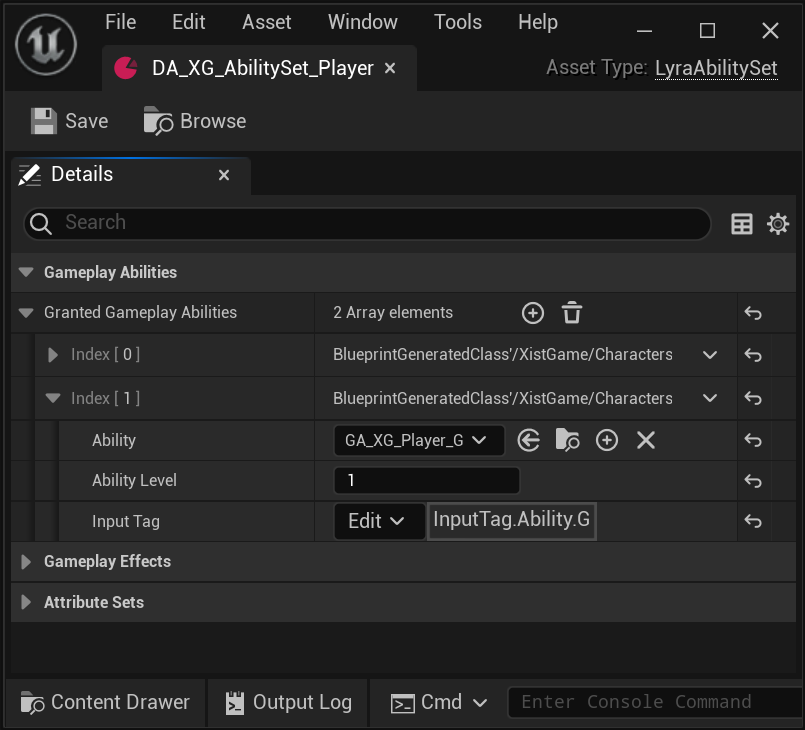
Open the LyraAbilitySet for your player, mine is called DA_XG_AbilitySet_Player.
Add the ability we created, associate it with the Input Tag we created.
Configure it like this:
Tip: If you don’t know which LyraAbilitySet data asset to modify:
- Open your Map
- Open this Map’s Experience definition
- Open the Experience’s Pawn Data asset
- It will be one of the data assets listed in
Abilities>Ability Sets- Mine is called
DA_XG_AbilitySet_Player
- Mine is called
Congratulations! You’ve Added a new Gameplay Ability
You’ve now added a new Gameplay Ability to Lyra, so when you’re playing the game and you push the G key, this ability will be activated and will run the code you put in its PerformAction function. Put whatever you want there!
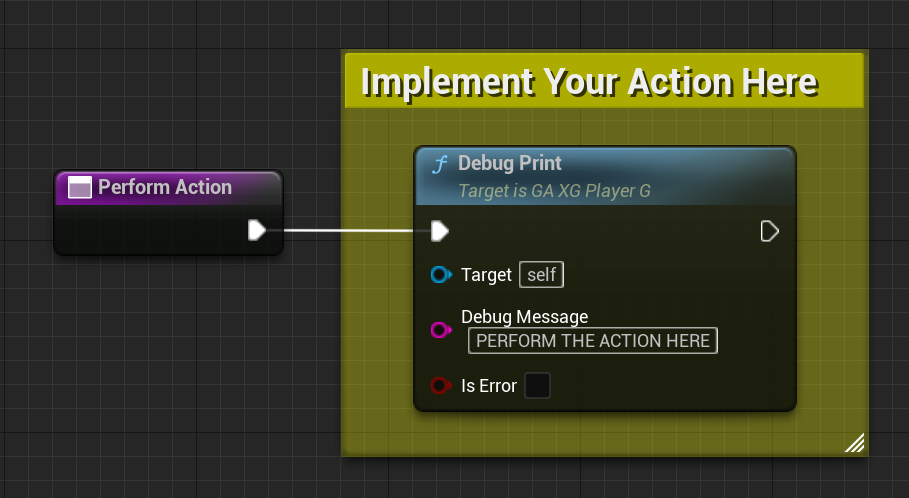
In this simple example, my PerformAction just calls DebugPrint, but you can have yours do whatever you want it to do.
YouTube Video Tutorial
If you have any issues, particularly finding where the appropriate data assets are that you should be editing, check out my YouTube video tutorial on this topic: